Self-Hosting
This document is a work in progress. Self-hosting works, and this document describes> one way of doing things. There are more that I'd like to add in the future!
Thrive natively support self-hosting, though at this moment only via the webapp, PWA, anddesktop app surfaces. This document presents a number of alternative ways to achieve this.
Self-hosting means you are running the Thrive application on your own infrastructure and servers rather than using the hosted version. This gives you fullcontrol over your data and the application, but requires managing the deploymentand maintenance yourself.
We've tried making the experience as smooth as possible, but realistically self-hostingrequires a modicum of tech knowledge. Even if you manage to follow the instructionsbelow, there are aspects of reliability, data recovery, security, etc. that are tricky to get right.If you're unsure, the hosted version aims to be respectfulof you and focused on privacy.
With A Linux VPS Via Docker (Hetzner, DigitalOcean, etc)
There's many ways to self-host Thrive, but running it on a Linux VPS via Docker is bothgeneral and flexibile. And also sufficiently high-level that even folks that are notsoftware developers can follow along.
Groundwork
Before we properly begin, there are a couple of steps you need to take: gettinga VPS, getting and configuring a domain, getting a certificate for the domain, and installing Docker.
If you're actively self hosting other projects, you probably have somesetup already done, so you just need to adapt the following to yoursituation. If you've self-hosted before, but not anymore, or even if you'venever done it, the setup should be straight-forward.
VPS
A VPS (Virtual Private Server) is a virtualized server that you can rent from acloud provider. It runs on their hardware but gives you full control over theoperating system and software, just like having your own dedicated server.Popular VPS providers include Hetzner,DigitalOcean, Linode, and Vultr.
For running Thrive, a basic VPS with 1-2 GB RAM and 1 CPU core should be sufficientfor personal use. The providers above all offer plans starting around $5-10/month.
The big cloud providers like AWS, GCP or Azure have similar offerings (and much> more), but they tend to require a more involved setup and have slightly higher> prices for what we'd need.
Each provider has their own way of setting things up, but it should befairly straightforward to buy a VPS and get SSH and root access to it.
Docker
You'll also need Docker installed on your VPS. Docker is a platform for runningapplications in containers - lightweight, isolated environments that package upall the dependencies needed to run the software. Most VPS providers offer imageswith Docker pre-installed, but if not, you can follow theofficial Docker installation guidefor your Linux distribution.
A Domain [Optional]
Your VPS will typically be accessible via an IP
Addresssuch as 32.114.15.21. You'll
probably want a domain like my-thrive-instance.comso accessing your instance
is simpler and more secure (because we'll also get acertificate for it).
So instead of going to something like http://32.114.15.21 to work, you
canvisit to a much nicer https://my-thrive-instance.com.
The standard setup for Thrive requires a domain and a certificate, but it alsooffers a way of running things without them. Also, if you've already got a VPNand have setup a domain for it, you can adopt to steps to easily make it workwith them.
You can get a domain from registrars like Namecheap,GoDaddy, or Google Domains.Most domains cost around $10-15 per year, but you can find ones for as low as $2 per year.
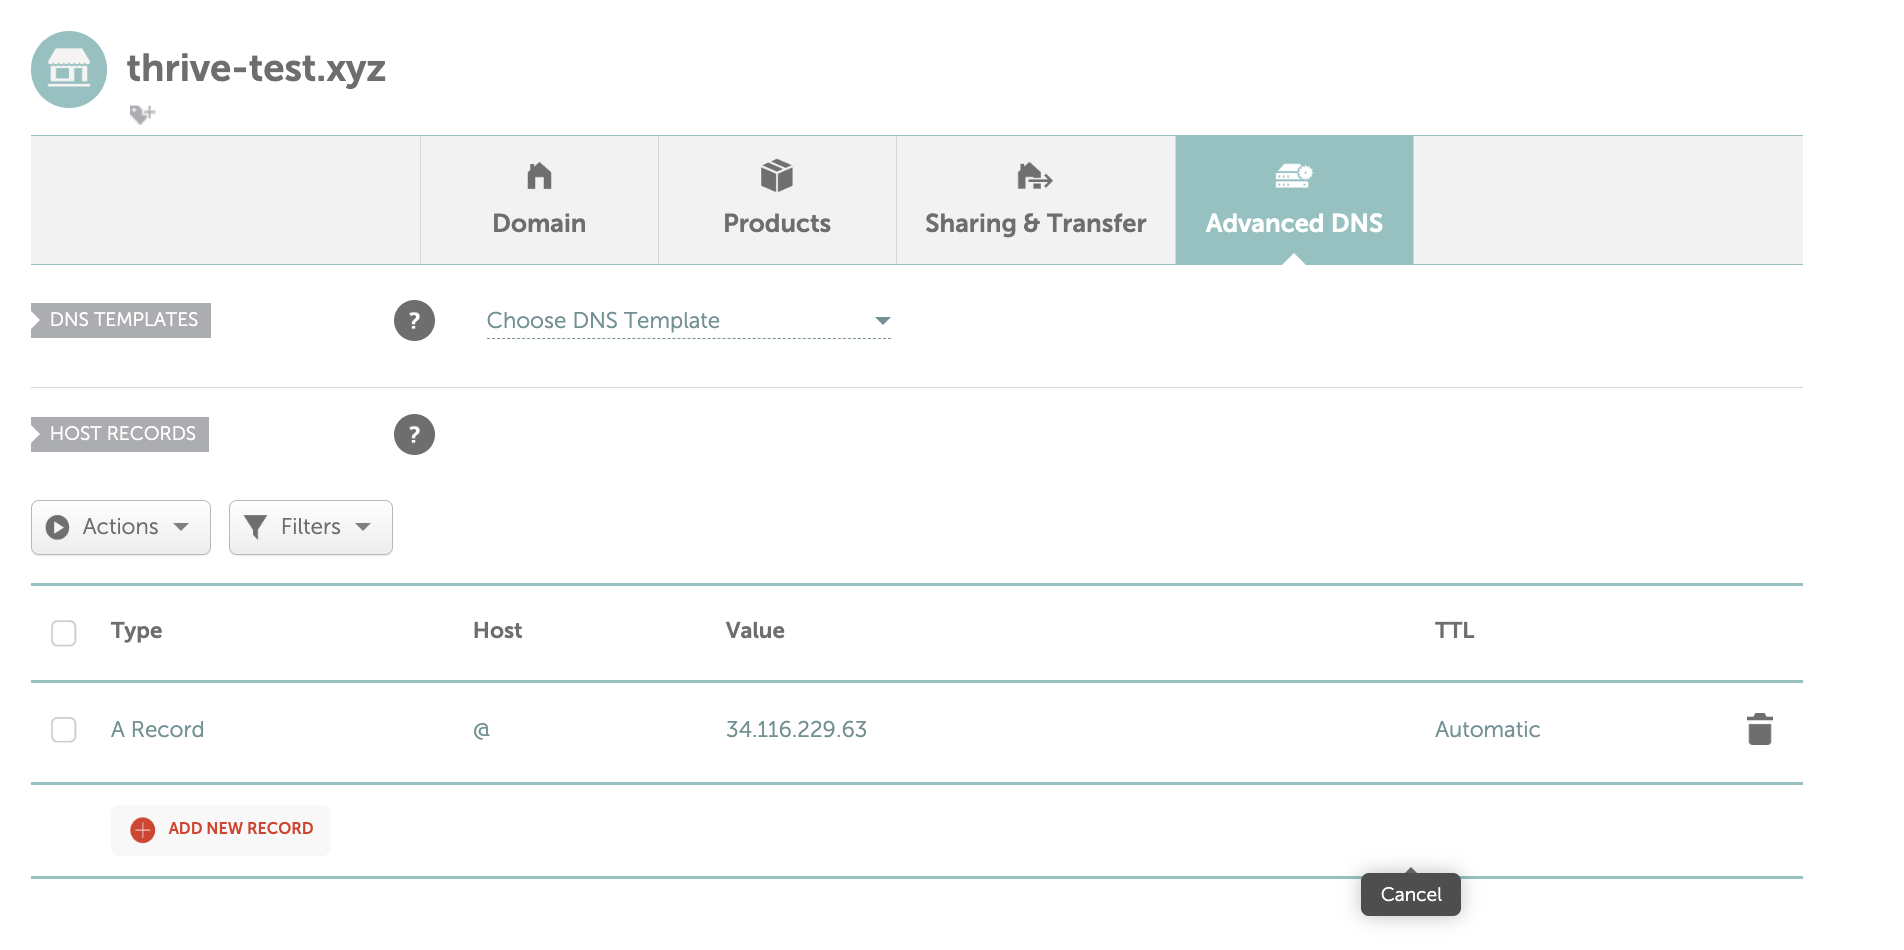
After purchasing, you'll need to point your domain to your VPS by creating an A
record inyour domain's DNS settings that points to your VPS's IP address. This
might looksomething like this:
Certificate via LetsEncrypt's Certbot [Optional]
The most common way nowadays to get and use an HTTPs certificate is viaLet's Encrypt. And certbotis the tool for actually obtaining and managing the certificate.
It's instructive to read about the effort, the concepts, and tools. Butin truth, you just need to look at the instructions fromother and pip.
At some point in that tutorial, you're going to run:
sudo certbot certonly --standalone
Which will ask you about the domain name you wish to obtain the certificatefor.
Enter your domain (say my-thrive-instance.com) and, if you've configuredthe
DNS settings correctly, you'll get two new files in:
/etc/letsencrypt/live/my-thrive-instance.com/fullchain.pem
/etc/letsencrypt/live/my-thrive-instance.com/privkey.pem
Don't forget to setup auto renewal from the instructions! Otherwise thecertificate will expire in 90 days. This is a low lifespan by design,to force folks to be on top of domain renewals!
Preparation
With the groundwork out of the way, we can actually do something thatis specific to Thrive.
First, you need to download some configuration files toyour machine. Putting these files in your home directory should be enough:
wget https://github.com/horia141/thrive/releases/latest/download/compose.yaml
wget https://github.com/horia141/thrive/releases/latest/download/nginx.conf
wget https://github.com/horia141/thrive/releases/latest/download/webui.conf
wget https://github.com/horia141/thrive/releases/latest/download/webui.nodomain.conf
It's instructive to inspect them, and you are free to modify them, butthere should not be any need.
There is some configuration that's specific to your instance of Thrive
thatyou'll need to provide though. You'll need to create and edit an .env file
like so:
touch .env
echo "NAME=Horia's Thrive" >> .env # Use your own name here
echo "DOMAIN=my-thrive-instance.com" >> .env # Use your own value here
echo "AUTH_TOKEN_SECRET=$(openssl rand -base64 32)" >> .env
echo "SESSION_COOKIE_SECRET=$(openssl rand -base64 32)" >> .env
When inspecting the .env file, it should look something like this:
NAME=Horia's Thrive
DOMAIN=my-thrive-instance.com
AUTH_TOKEN_SECRET=s6cfvG3E3vyzXjtIM/1I6+t9oM9pGBC6GG0O9L7XmiY=
SESSION_COOKIE_SECRET=FI3X/vjPJCUUeH+tu2OvhCQn7i1HyiVV2Vl4g/ce9DQ=
To check that docker has picked up the config and is correctly integratingit,
run docker compose config and check that no errors are reported.
Running Without The Domain [Optional]
If you don't want to use a domain, you can just not provide the
DOMAINenvironment value, but also edit ngnix.conf and replace
webui.confwith webui.nodomain.conf - a one word change!
Running Things
If you're using a Linux distribution that uses systemd (which most shouldbe
these days), you need to enable docker as a startup service like so:
sudo systemctl enable docker
Now, you just need to run things via
sudo docker compose up -d
docker compose logs -f
You'll then see some output like:
[+] Running 3/3
... docker setting things up!
Attaching to frontend-1, webapi-1, webui-1
... output omitted
webui-1     | ================================================================================
webui-1     | Starting Jupiter WebUI:
webui-1     |   Version: 1.1.4
webui-1     |   Environment: production
webui-1     |   Hosting: self-hosted
webui-1     | ================================================================================
... output omitted
webapi-1    | ================================================================================
webapi-1    | Starting Jupiter WebAPI:
webapi-1    |   Version: 1.1.4
webapi-1    |   Environment: production
webapi-1    |   Hosting: self-hosted
webapi-1    | ================================================================================
... output omitted
webapi-1    | 2025-03-09 16:17:03 INFO     Uvicorn running ...
... output omitted
webui-1     | Remix App Server started at http://localhost:2000 (http://0.0.0.0:2000)
This signals that the services making up Thrive are running and healthy.It should take less than a minute to get to this output. If there's any errors,you're free to debug them, or reach out on our channels(GitHub issues, Discord,etc) for help.
Testing & Surfaces
You can now access thrive by visiting the IP address or domain associated with your VPS.
Currently only the webapp, desktop app, and PWA are supported ways of interacting with yourself hosted version.
Whereas the webapp and PWA have a straightforward interactin pattern - visit your domainand access the app, and optionally install the PWA that is specific to this particularinstance - the desktop app is designed to work with multiple hosts as a unit.
When you open it, you'll see an option to pick a server on the login or init screen,which will take you to something like this:
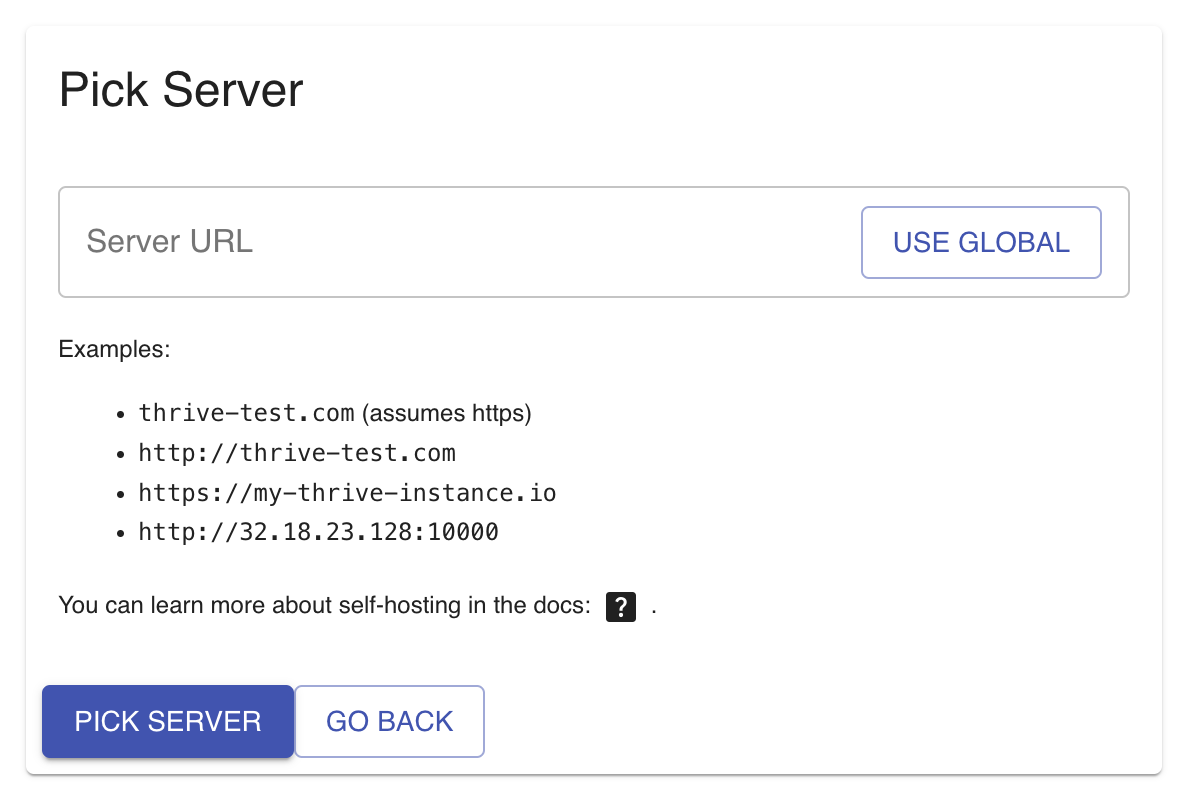
You can enter the URL of your server (typically https://your-domain.com) and
the appwill reconfigure to speak with it instead of the global hosted server.
You can alwayscome back to the global one, or switch between several instances.
Backups
WIP
Reliability
The current setup will be resilient against machine restarts, service failures,
etc.With a typical dedicated server or VPS setup this should get you to a cool
3 ninesof availability (or ±8 hours a year of downtime). For self-hosting this
should bemore than enough.
For any higher level of availability, you'll need to find a provider that offers machineswith a higher availability SLA. At this point, the typical high-availabilty toolbox ofmultiple machines, replicated storage, etc. is not available for the self-hosted version.
Updating
To to a newer version of Thrive, run the following command:
docker compose pull
If there's new Docker images they will be pulled. You can then restart the Thrive instance via:
sudo docker compose down
sudo docker compose up -d
sudo docker compose logs -f
Thrive is built in such a way that it will ensure there's a smooth update, and allcomponents are updated and made compatible with the new version.
With A High-Level Hosting Service (Render, Vercel, Genezio, etc.)
WIP
More Alternatives
Thrive is developed on MacOS with a suite of relatively cross-platform technologies,and the hosted service runs on render.com. If you need morethan the VPS setup, it's probably doable, but requires a bit of extra elbowgrease. Contact us and we'll get it sorted.